Last month, I-CAR started a discussion of welding requirements for heavy duty collision repair. Brian Wasson, Welding Program Manager at I-CAR, presented ‘What’s New in Heavy Duty Welding’ at the HD Forum in Fort Worth, Texas. The first step is identifying the materials and preparing the working environment and tools. Next up is the actual welding process.
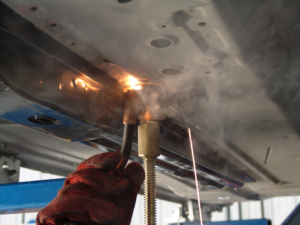
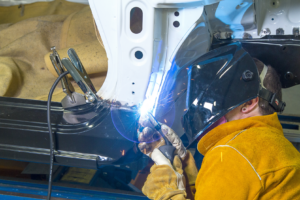
Preparation is key. Don’t forget to wear the proper safety gear, including a helmet with proper lens shade, respirator, heat-resistant jacket and pants, gloves, and boots. Did you know that inhalation of welding fumes can lead to Parkinson’s disease, and viewing the UV rays from a weld arc without proper shading causes “flash burn,” which is like a severe sunburn of the eyes?
Once the correct welding machine is identified and set up and the right electrode wire is selected to match the material being joined, you can move forward on the steps needed for a proper weld. First, perform test welds on the sample material; most use scrap from the part being removed. The tests must duplicate the actual weld you are going to perform in material, orientation and application. Inspection of test welds ensures the setup and method are correct. Tests typically include visual inspection and bend and break destructive tests. However, on certain weld joints it may be required to perform magnetic particle, X-ray, or dye penetrate inspections. These advanced tests are typically required where hazardous material is being transported; however, there may be other applications, too.
Documentation of test samples and results should be added to the repair file to demonstrate that proper steps have been taken. This one simple step can save headaches down the road.
How can you make sure you and your staff have the skills and knowledge to perform those repairs? We will discuss welding training options next month.